In the previous installment, we addressed shooting RAW vs. JPG, shutter speed, Aperture, ISO, Exposure and Composition. This month, we talk more about the principles of good photography; these are elements which contribute to your achieving excellence in your photographic journey.
White balance
Most of the time, many of us shoot using automatic white balance, which allows the camera to determine entirely what the setting should be. In some instances, however, the camera’s sensor can be fooled into selecting a setting that is not representative what you actually see when you are on-site. This is a perplexing matter for us as humans because we have our own automatic white balance built in and assume the camera’s selections are as good as ours. Yet there are times where the sensor can be challenged by complex color temperatures such as shooting indoors under various types of light, multiple light sources or even outdoors at various times of day in natural daylight. As the sun rises and sets in the sky, the color temperatures actually vary depending on its angle. In addition to having specific white balance settings for common lighting sources on your camera, you also have the ability to customize the white balance.
In order to use the custom white balance settings, you will need to use an 18% grey card, a white card or an Expodisc. The 18% grey card is usually reversible and has white on the other side. Personally, I use the Expodisc Neutral and find this to be a great tool to set custom white balance. I would recommend buying the largest one and use it on all your lenses instead of buying one for each lens. The Expodisc also doubles as a great incident light meter. (See this gallery for an excellent representation of the before and after effects of the Expodisc.)
The low budget solution is to use the older semi-translucent top from an old Pringles can or something similar. Check with your camera manufacturer’s website or your manual for setting white balance. Alternately, you can also view it on Youtube, such as this video, which details setting custom white balance on a Canon dSLR. An additional benefit to shooting in RAW mode is that you can always adjust your white balance in post production, since you are working on raw data from your sensor; this facility is degraded if you shoot in JPG.
Creative mode: Aperture Priority/Shutter Priority/Full Manual
The whole point of getting an advanced dSLR is so you can shoot better quality pictures, and in order to do this, you’ll have to abandon the automatic modes where the camera guesses what you are shooting by entering the creative modes on your camera. These are denoted by the A/S/M (Aperture Priority, Shutter Priority and Manual) settings for Nikon and Av/Tv/M (Aperture Value, Time Value and Manual) settings for Canon. Instead of having your camera guess what you want to do or using program-specific modes like Macro/Sports or Portrait on your dial, you should explore the above-mentioned settings where you have some control of the way the camera operates – after all, that is why you purchased the camera!
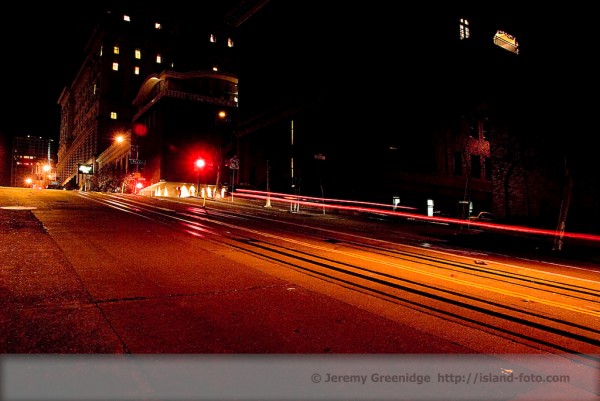
In part one, we talked about the function of the Shutter and the Aperture; now we will venture on to explain how they relate to each other. When shooing, you want to not only have technically-correct photos, but also have the input you wish to impart on your images that makes them unique. To do this, you should determine if you primarily want to control your Depth of Field or to stop or extend the range of motion. This simple choice will determine your selection of Aperture Priority/Value or Shutter Priority/Value. When you have determined the selection you want and the value you wish to use, the camera will adjust the other settings to give you the correct exposure. For example, if you chose to adjust the shutter speed, the camera will adjust the aperture to give you the correct exposure as determined by the camera metering system. On the other hand, if you choose to adjust the Aperture, the camera will adjust the shutter speed to give you the appropriate exposure. Remember that if your settings do not permit correct exposure and you have a low or high exposure warning from your camera, you can compensate by adjusting your ISO. Alternately, you can have full control over both your aperture and shutter speed by selecting full manual mode and using your meter in the camera to guide you. While I don’t suggest you try this for your first time on an important shoot that you can’t do over, I do suggest you master this setting in your spare time. It is especially good for night photography, and you can achieve premium results with a little effort and practice
Choosing the Correct Focus Mode and Focus Points
Focusing is important; nothing ruins a picture like it being out of focus (unless that was your artistic intent). Most modern cameras have a variety of focus modes. I shoot mostly with Nikon dSLRs and will use their operation for my examples; if you have a Canon or any other camera, you will have similar settings that you can utilize on your camera. On any modern dSLR, you have manual focus and auto focus.
While manual focus is self-explanatory, the realm of auto focus contains subsets within it; You have AF-C (continuous auto focus), AF-S (single auto focus) and AF-A (automatic auto focus). AF-C is used generally for photographing moving subjects, such as sports events or children at play, the focus mode is always on and the camera will not beep to indicate it has accomplished focus. AF-S is used to photograph subjects that do not move, such as landscapes, seascapes, portraits or still life. This mode not only beeps upon achieving focus, but also allow you to recompose your image in your viewfinder once you keep your button halfway pressed. AF-A allows the camera to make the choice between the AF-C and AF-A modes.
Closely related to this is taking command of your focus points; you should always take charge of instead of letting the camera guess your subject matter. Many photographs have been ruined by the camera automatically selecting something in the foreground or background as the main subject matter rather than the intended subject. The way to avoid this dilemma is to choose your own focus point and then recompose your image if necessary. Generally, I like to do this using my center focus point because that is often the most accurate on any camera. The following is an example of an image that has a focus issue:
Modern cameras allow for a variety of Auto Focus modes, here are the popular ones:
•   Single Area Auto Focus: Allows the photographer selects there own point of focus using the focus point selector. This is good for images that don’t move.
•   Dynamic Area Auto Focus: Allows the photographer to select the point of focus, but uses surrounding focus points to gain information and provide a more robust image. This is best used with continuous focus for subjects that are moving during shooting.
•   Group Dynamic Auto Focus: This mode allows you to group your sensors in a diamond shape and focuses on the center of the selected group, then lets you select the approximate area of the viewfinder in which your subject will appear. This is especially good for fast moving subjects.
•   Dynamic Area Auto Focus with Closest Subject Priority: The camera automatically selects the closest subject to focus on. This may work best when subjects move erratically, but keep in mind that you are putting all faith in the camera’s focusing algorithms.
On-Camera Flash
For me, as well for many other photographers, pop up on-camera flashes are one of those things that rank low on my list of things I like; it is slightly above slamming my finger in a car’s door. On-camera flash provides horrible, non-directional lighting. Although some modifiers are available, the best advice I can offer is to not use the on-camera flash at all. Instead, purchase a hotshoe mountable flash from Nikon’s or Canon’s venerable line that provides you with much more capability and directional control for your lighting. As your flash use progresses, you may even wish to remotely command these flashes using Nikon’s SU-800 Wireless Remote Speedlite Commander or Canon’s ST-E2 Remote Transmitter.
Use a Tripod
I have to confess that when I first saw people who had their cameras almost permanently attached to a tripod, I thought it was such a drag. I’ve come a long way since then and find that more often than not, a tripod is the only way you can achieve the artistic intent you wish to portray, especially when shooting landscapes, low light photography, long exposures, or any situation in which your hand may shake while exposing your image. While modern cameras achieve negation of some of the effects through the implementation of vibration reduction technology, nothing beats a tripod where applicable.
Lens filters
Every lens should have a filter on it – not only to filter UV light, but also to protect the lens. If you should ever have the unfortunate experience of dropping a lens, especially one of the near-$1000 Macro lenses, you’ll appreciate it when your filter is broken while your lens element is safe. Keep in mind that when you do purchase filters, GET GOOD GLASS! It kills the effort when you’ve got your L-series lens on your camera and a terrible ten dollar filter that it has to shoot through. Filters provide many added effects to your photographic cadre, so explore them as your budget permits. Photoshop also provides an array of built-in after exposure filters and there are many plug-in filters that you can apply to your images, but they may not be as effective as filters you manually place on your lens.
Camera straps
Camera straps are the most-ignored accessory and the ones that make the most impact on your shooting comfort; you’ll know what I mean if you’ve ever shot for a whole day with the camera strap around your neck. The stock woven camera straps are too abrasive and leave you with a burning abrasion on your neck, so I suggest a modern neoprene strap that give you much more comfort and allows your camera to have a little give on the strap, which is important when you are walking around with your camera because it does not jerk around your neck at every step. If you are trendy and require a fashionable camera strap, check out Trendy Camera Straps (no, really – that’s their name).
Whenever you are using your camera, use the strap as a safeguard. When you do not have the camera around your neck wrap it around your hand a couple times. If the camera slips out of your hand at any time, you will not instantly be reduced to tears mid-shoot!
Happy Shooting!



Trackbacks/Pingbacks